This time my instructions will be not as clear as the one that I did before just because I'm lazy :P
Written by Iris Wu
Materials
- Crochet hook
- Crochet Yarn, 6 colors: pink, white, beige, fucsia (or purple), red and green
- Thick needle (the one for sewing crochet things)
- Stuffing
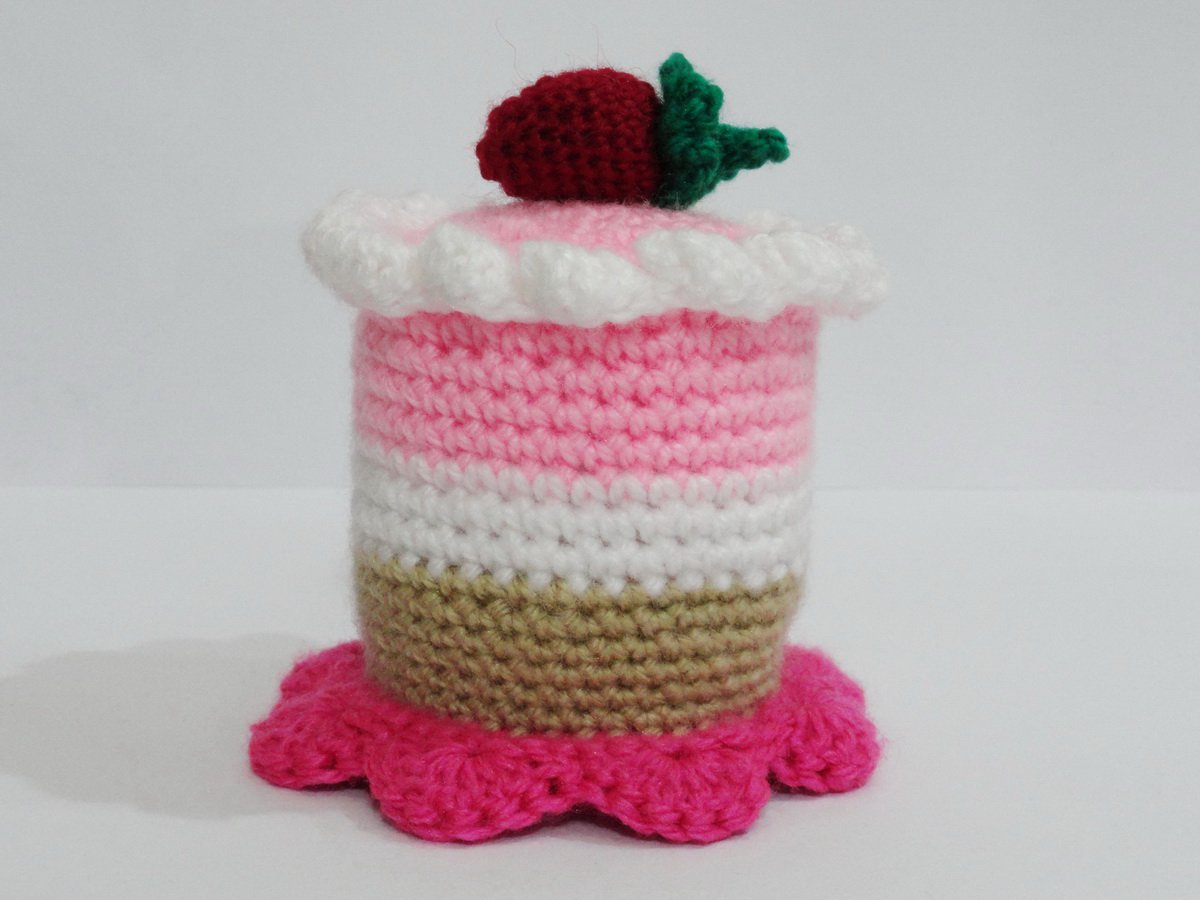
Cake
With pink, magic circle or chain 3
Rnd 1: 6 sc
Rnd 2: 12 sc
Rnd 3: 18 sc
Rnd 4: 24 sc
Rnd 5: 30 sc
Rnd 6: 36 sc
Rnd 7: 42 sc
Rnd 8: Single crochet in each stitch around, this round will be crocheted in the back loops, 42 sc
Rnd 9~12: Single crochet in each stitch around, 42 sc
Change the color to white
Rnd 13~15: Single crochet in each stitch around, 42 sc
Change the color to beige
Rnd 16~20: Single crochet in each stitch around, 42 sc
Fasten off and cut the yarn. You will not need to cut a tail, just hide the yarn inside the cake.
Base
With fucsia or purple, magic circle or chain 3.
Rnd 1: 6 sc, join with the first sc, chain 1
Rnd 2: 12 sc, join with the first sc, chain 1
Rnd 3: 18 sc, join with the first sc, chain 1
Rnd 4: 24 sc, join with the first sc, chain 1
Rnd 5: 30 sc, join with the first sc, chain 1
Rnd 6: 36 sc, join with the first sc, chain 1
Rnd 7: 42 sc, join with the first sc, chain 1
Rnd 8: 48 sc, join with the first sc, chain 1
Rnd 9: *Single crochet, skip 2 stitches, 8 double crochet, skip 2 stitches, repeat from * around, join with the first sc, the will be 8 petals in total.
Fasten off and cut a long tail to sew the cake and the base together.
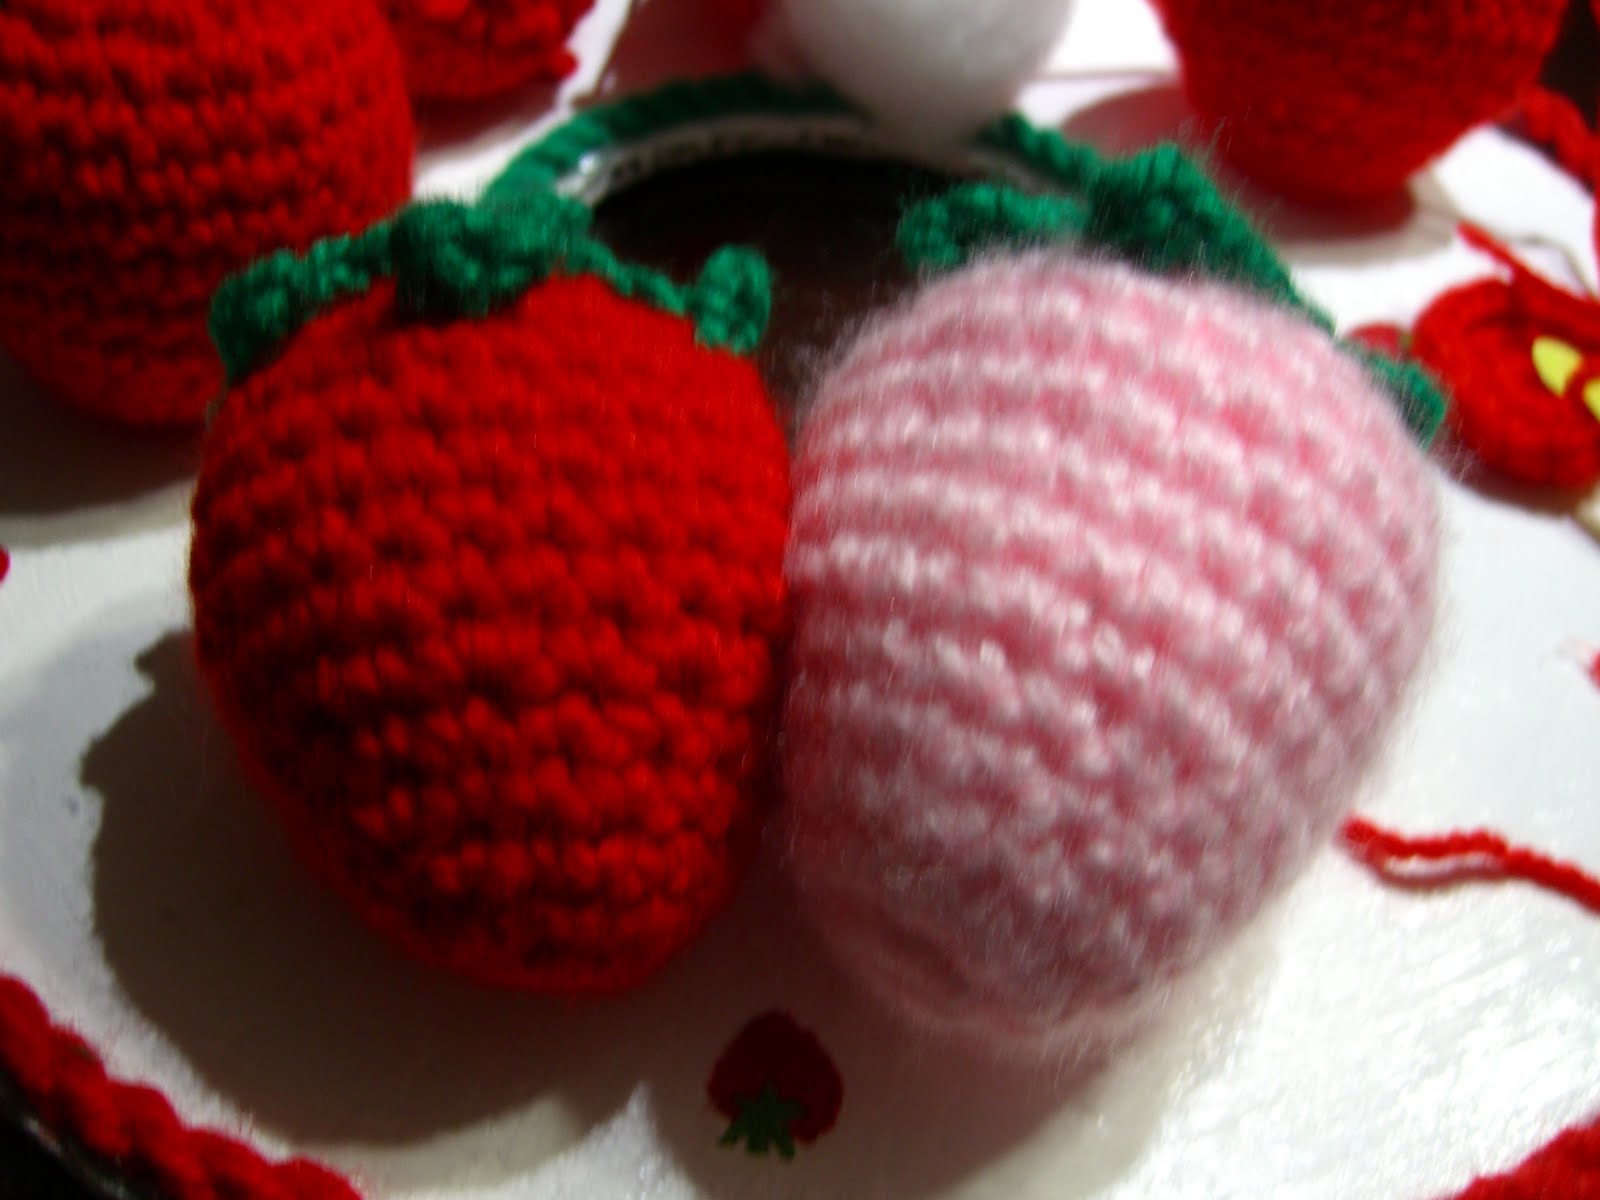
Strawberry
You can use the strawberry that appears in the post of “Amigurumi Strawberry” or make a smaller strawberry with the instructions below.
With red, magic circle or chain 3
Rnd 1: 6 sc
Rnd 2: *2 sc in the first stitch, 1 sc in the next stitch, repeat from * until there’s 9 sc
Rnd 3: Single crochet in each stitch around, 9 sc
Rnd 4: *2 sc in the first stitch, 2 sc in the next 2 stitches, repeat from * until there’s 12 sc
Rnd 5~7: Single crochet in each stitch around, 12 sc. Start stuffing here.
Rnd 8: Single crochet decrease (sc2tog) 6 times, 6 sc
Fasten off, cut a tail and close the hole up.
With green, chain 5
Rnd 1: 10 sc, join with the first sc, chain 1
Rnd 2: *Single crochet in the first stitch, chain 5, slip stitch with the sc below, single crochet in the next stitch, repeat from * until there’s 5 “petals”, join with the first sc.
Fasten off and cut a very long tail. Pull the very long tail into the hole of the chain
Chain 5 with the tail and slip stitch from the second chain from the hook. Pull out the yarn and pull the tail back to the hole.
Sew the “leaves” to the strawberry and don’t cut the tail yet.
Sew the cake to the seventh round of the base and stuff the cake before it closes up. Sew the strawberry with the green yarn that is left.
For the white cream around the cake, with white yarn, join the round 8 of the cake with a slip knot
Rnd 1: Single crochet in the first stitch, *skip 2 stitches, 5 treble crochet in the next stitch, single crochet in the same stitch, repeat from * around. (Taken from "Crochet Geek"'s blog)
Fasten off and sew the remaining yarn into the cake.